


Drywall joint compound—that stuff is pretty much the MVP when it comes to finishing up drywall projects. It’s this versatile paste that does a bunch of things: sealing up joints, filling in gaps, and giving you that nice, smooth surface ready for paint or whatever decoration you're into. Honestly, knowing how to use it the right way can make a huge difference in how your project turns out — not just looking good but also holding up over time. Whether you’re a pro contractor or just someone tackling a DIY project on the weekend, getting the hang of applying this compound smoothly can save you a lot of headaches and give your interior that polished look you’re aiming for.
In this guide, we’ll go over the different kinds of drywall joint compound out there — from ready-mixed to the powder stuff — and talk about when and how to use each one. We’ll also share some practical tips and tricks to help you get that perfect, flawless finish every single time. Using the right tools and techniques, your drywall surfaces won’t just look great—they’ll stand up to wear and tear better too. So, stick around as we break down the ins and outs of working with drywall joint compound, making your next project look totally professional without necessarily needing a pro’s level of skill.

What is Drywall Joint Compound: A Comprehensive Overview

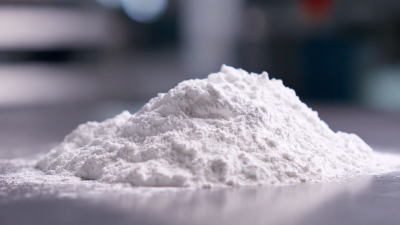
Drywall joint compound, commonly referred to as mud, is a versatile material used in the finishing process of drywall installation. Composed of gypsum dust mixed with water and other additives, it serves various purposes, including filling seams, covering screw holes, and creating a smooth surface for painting. Its composition allows for easy application and sanding, making it an essential tool for both professionals and DIY enthusiasts alike.
When applying drywall joint compound, it's crucial to use appropriate techniques to achieve a flawless finish. The compound can be applied using a taping knife or a trowel, ensuring even coverage over joints and corners. Typically, multiple coats are required, with each coat needing to dry completely before the next application. Once finished, the surface should be sanded with fine-grit sandpaper to remove any imperfections, resulting in a seamless and professional look. Properly using joint compound not only enhances the appearance of walls but also improves their durability, making it a key element in drywall finishing.

Enhancing Tile Adhesive Performance with Redispersible Polymer Powder AP2080: Benefits and Applications
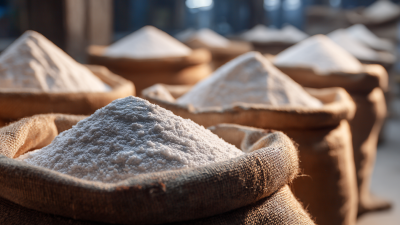
Enhancing the performance of tile adhesives has become a critical focus in the construction industry, and one effective solution is the use of redispersible polymer powder like ADHES® AP2080. As a popular choice among redispersible powders, AP2080 offers significant advantages in improving adhesion strength and flexibility in tile applications. Its formulation aligns well with various other products such as VINNAPAS 5010N, MP2104, and DA1100/1120, making it a versatile option for manufacturers.
The incorporation of redispersible polymer powders not only enhances tile adhesives but also serves as a special binder in synthetic resin bond systems. Their applications extend beyond traditional cement-based systems, impacting materials such as gypsum-based putty and wall plaster mortars. With its excellent workability and anti-sliding properties, ADHES® AP2080 significantly improves the rheological behavior and sag resistance of the mixtures it is incorporated into. This results in easier application and longer-lasting performance of the adhesives, making it a vital component for professionals in the tile installation market.

FAQS
: Drywall joint compound, also known as mud, is a material used in drywall finishing that is composed of gypsum dust mixed with water and additives. It is used to fill seams, cover screw holes, and create a smooth painting surface.
Essential tools for applying joint compound include a mud pan, various sizes of drywall knives, a sanding sponge, and a trowel. These tools help ensure even application and a professional finish.
To apply joint compound, start by applying a generous layer over the seams with a taping knife, then allow it to dry completely before sanding and applying additional coats as needed.
Joint compound typically requires about 24 hours to dry completely, but drying time can vary based on humidity levels.
Sanding is important as it helps smooth out any imperfections in the dried compound, contributing to a seamless and professional finish on the walls.
Multiple coats are recommended for the best results, with each coat needing to be sanded and dried before applying the next.
Yes, proper application of joint compound not only enhances aesthetic appeal but can also increase the overall value of home renovations by up to 80%.
Applying a primer after joint compound helps achieve a uniform surface and improves paint adhesion, leading to a better final appearance.
A 6-inch knife is recommended for smaller joints, while a 12-inch knife is better for larger areas, allowing for effective feathering of the compound edges.
Tools like drywall knives should be kept clean to prevent mixing old compound with new applications, which can lead to inconsistencies in the finish.
Conclusion
Drywall Joint Compound is an essential material used in the finishing process of drywall installations, providing a smooth and professional surface. This comprehensive overview outlines the various types of joint compounds available, each tailored for specific applications in construction projects. Understanding the essential tools required for effective application is crucial, as is following a step-by-step guide that details the application process. Common pitfalls can hinder the finishing quality, making it important to recognize and avoid these mistakes while employing expert tips for smoothing and finishing techniques. Finally, adequately curing and sanding the joint compound ensures a durable and polished result, meeting the high standards demanded in the construction industry.
At Longou International Business (Shanghai) Co., Ltd., we are dedicated to supplying advanced construction materials and solutions, including high-quality drywall joint compounds, to fulfill the needs of our global customers. Our commitment to providing effective application solutions positions us as a leader in the construction chemicals additives market.
Related Posts
-
How to Effectively Utilize Hydroxy Propyl Methyl Cellulose in Your Manufacturing Process
-

Exploring Opportunities in Redispersible Polymer Powder at the 2025 China Import and Export Fair
-

Understanding the Role of Hpmc Manufacturer in Modern Construction Materials
-
Crafting Excellence with Chinese Manufacturing Powered by Best Thickening Agent Hpmc for Detergent
-

How to Maximize Performance with Redispersible Polymer Powders in Your Formulations
-

The Versatile Applications of Hydroxy Ethyl Cellulose in Modern Industries
